Motion Capture Lab #1
- Sep 12, 2019
- 3 min read
Saturday Motion capture session Documentation:
Documentation Motion capture LAB #1:
Here are the general steps to start the process of capturing Motion
Calibration
Preparing/choosing Assets
Creating Assets - in our case: Rigid Bodies
Recording Bodies movement
Live input to UNREAL
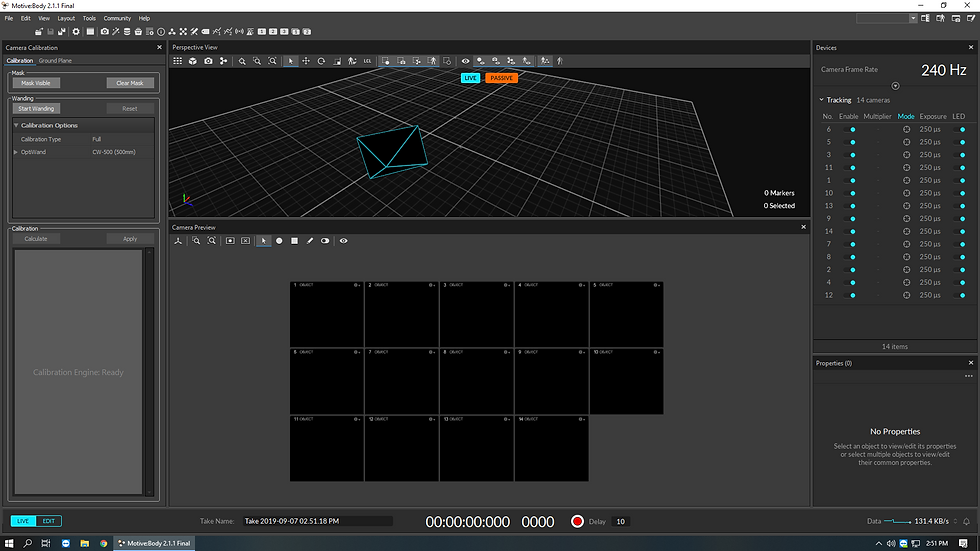
Calibration
The main goal is that the Camera will detect its location in the space and the distances between each one.
We masked out all the object that we don't want to capture in our session.
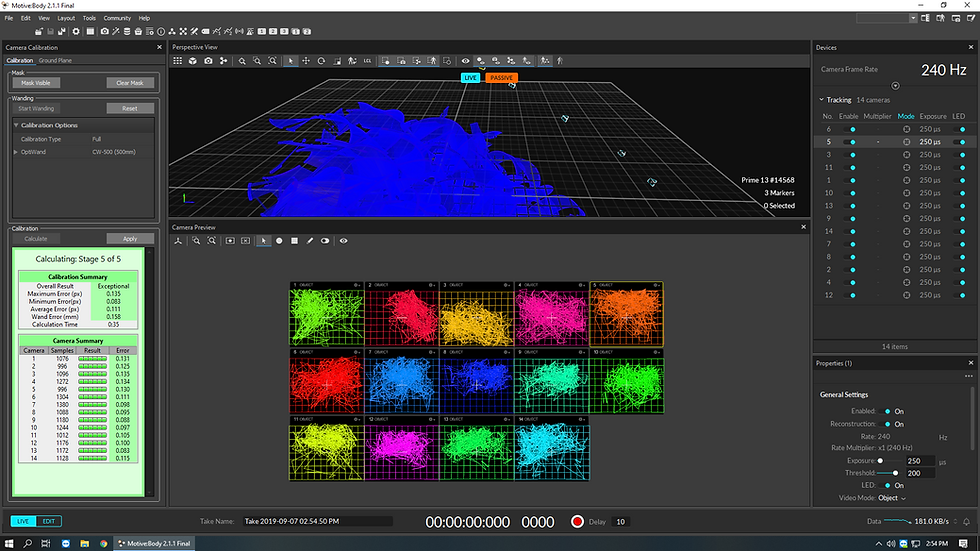
We used the T-Wand with an 8-figure motion to wave around the motion capture area so we will see at list 10,000 samples from each Camera.
The score should be nothing less than "very-high" so After we calculate the samples, we will have an "Exceptional" score to continue our process.
We are ready to apply; sometimes, it takes a few seconds for the window to pop up.
Mask visibile
Wanding results

Calculation
Ground plane Calibration
Moving to the second phase of calibration, at this point, we need to detect the plane, the surface where we are going to move. Using the L-shape calibration tool, we placed it in the middle of our room, facing where the L to where we want our bodies to look. It doesn't mean that all Camera should point at the X in the middle of the room, sometime it would be better to point some out of the caption area, so if there were some bleeding, they would be on the records.

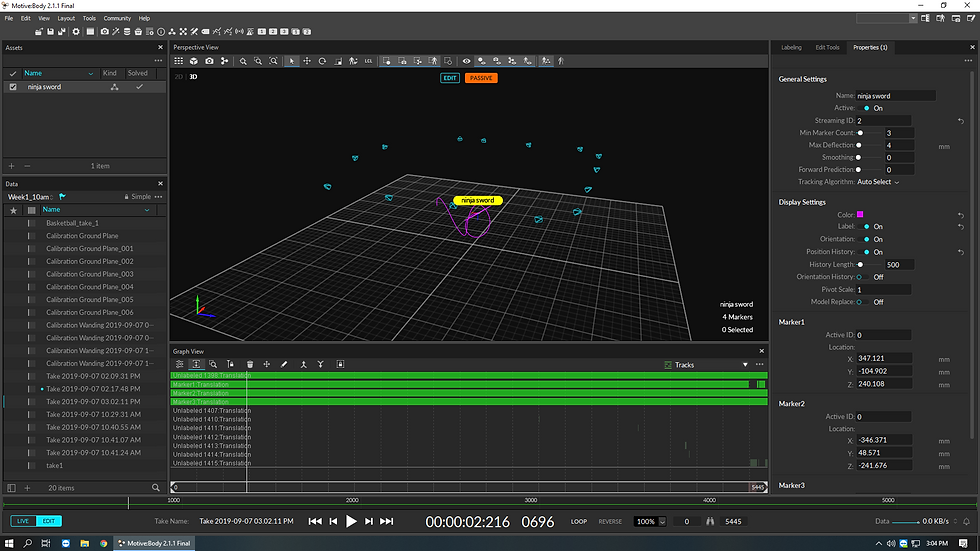
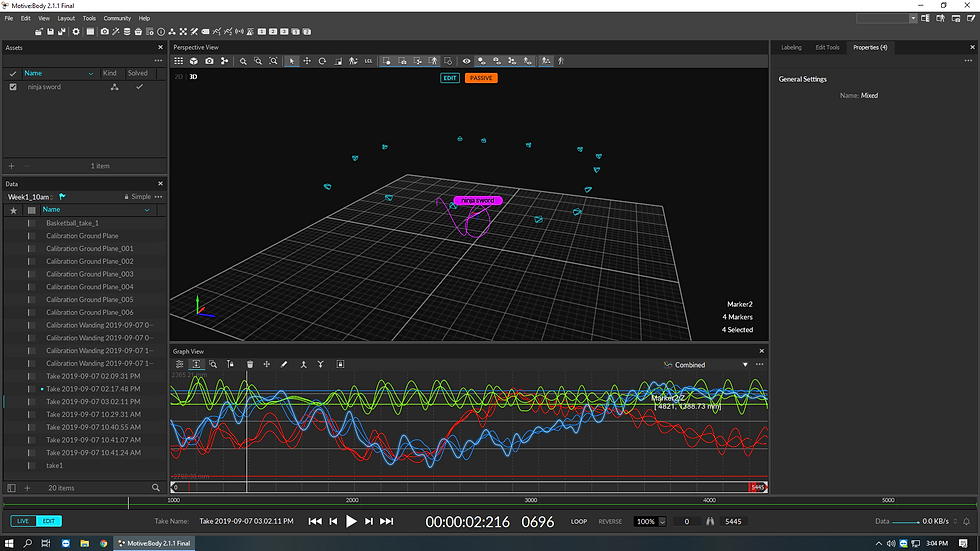
Creating / Making Rigid Body
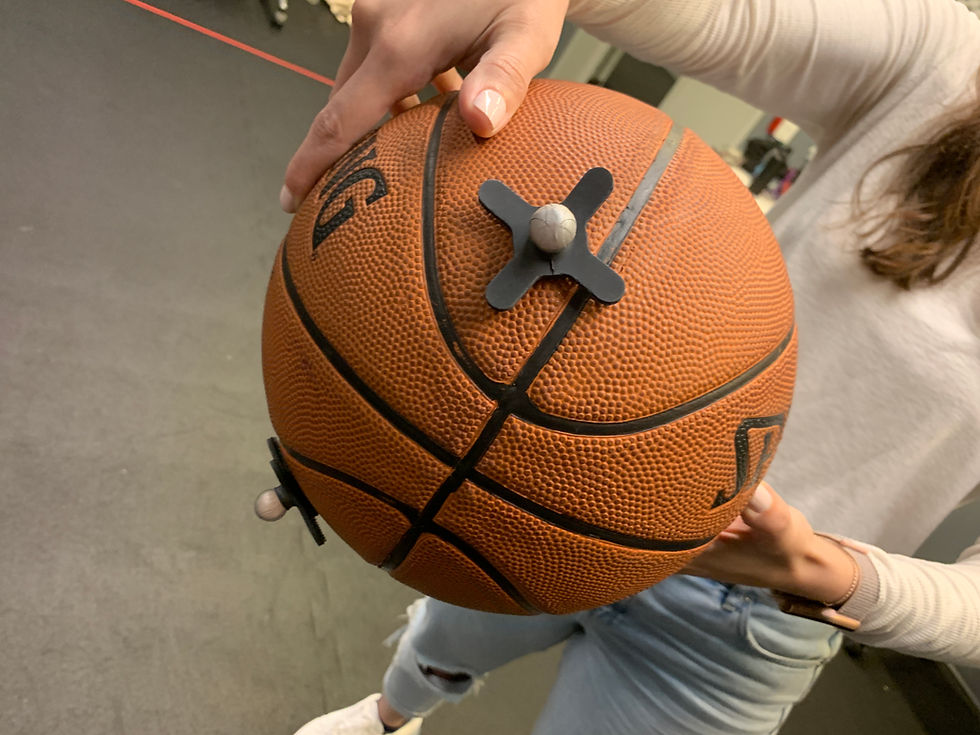
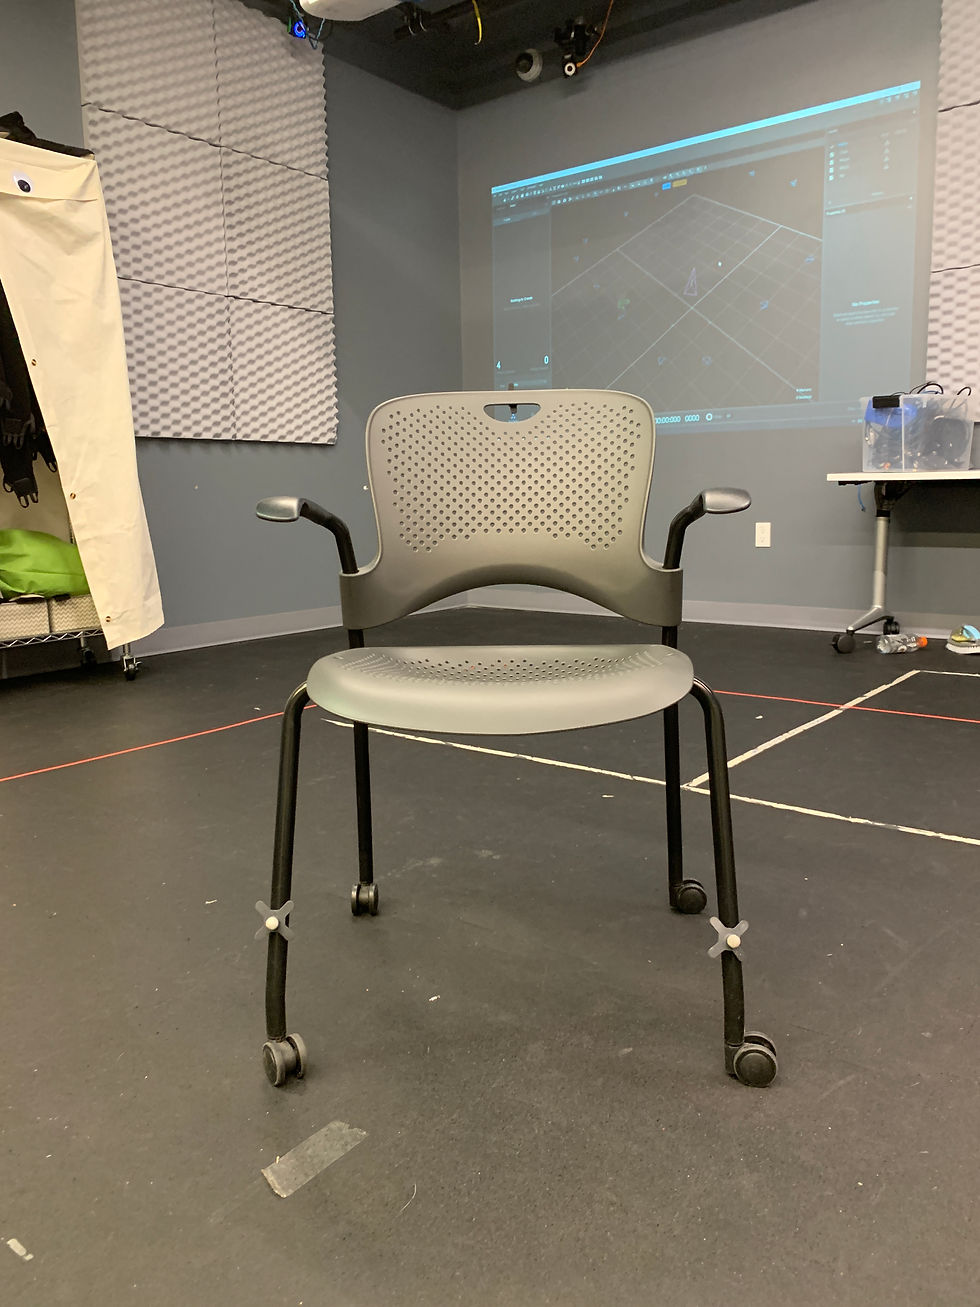
Every rigid body has to have at list three markers with a unique configuration (where the dots placed). It's better practice to create the rigid bodies one after the other.
Step into the motion capture area, standstill.
The technician will choose the dots that are showing up in motive.
Give a unique name to your rigid body.
Every rigid body has a centroid. Think about it when creating the rigid bodies.
We can assign different configuration for each rigid body depending on the way we
will use the data:
smoothness will be necessary if our rigid body is a camera
we can turn a name tag that will follow the rigid body so it will be easier to recognize when recording.
After playing with the ready-made rigid bodies from the cabinet, we created two new rigid bodies: a basketball and a moving chair.
we had a few bodies ready to be tested. We did a small recording because we wanted to see the quality of our recording. Some bodies data were a little less clean, while others seemed to be very smooth. For Example, the ball was amazing to capture, even when we spanned it on one finger.
Live input to UNREAL
Unreal is connected to the same IP address as the motive computer so the data is set to flow from one to the other.

It was very easy to assign some objects to our bodies from motive. here in this video we made our basketball the camera.
and Here one body was the camera and the chair was fire moving in our UNREAL scene
I enjoyed the session, the feeling of control and playfulness that comes from pairing the bodies to object brought joy and a lot of curiosity. What can I do with that? Everything. My entire week was observing objects in my daily routine. I thought, how would they look like if I were to capture them and use them in a parallel reality or just some graphics.
The interactivity aspect of it also struck me, all of a sudden, everything seemed to be affected by everything, so why aren't we tracking everything? What if I will change every object social's tabus to a new movement or well-known behavior?

Comments